InLattice AP/AR Automation
The simplest way to automate your accounting process
Vendor Portal for QuickBooks Online
Simplify & Streamline Your AP – Eliminate Data Entry
Receive Vendor Invoices and Post it as Bills in QuickBooks
The process includes registration, one time setup of vendor accounts, receiving vendor invoices and posting bills to QuickBooks.
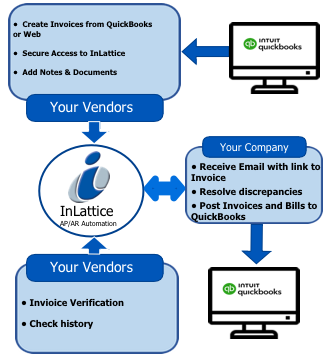
How it Works?
- If you have QuickBooks Online account already, go to step Register with InLattice. Otherwise, register your QuickBooks Online account .
- After registration, login to your QuickBooks Online account and create your company.


- Add customer and vendor in your QuickBooks Online company.
- Register with InLattice.
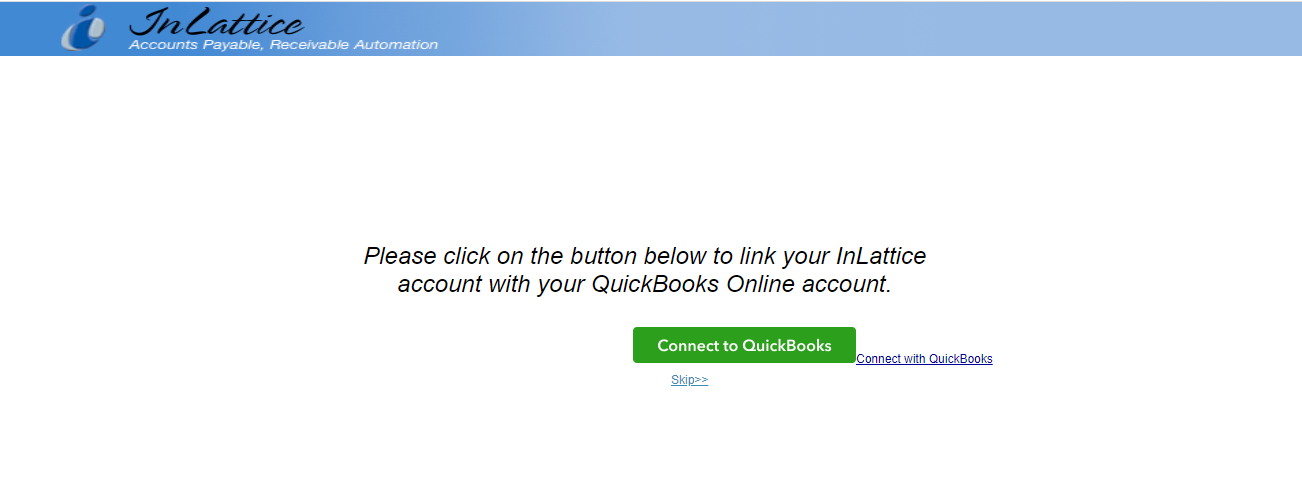
- When you login first time to InLattice, the screen shown below gives the option to link your InLattice account with your QuickBooks Online account.
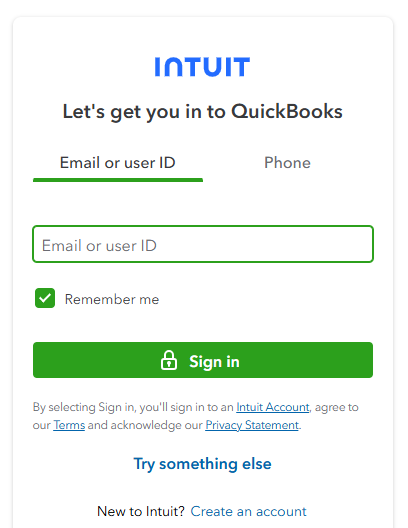
- If you have not logged in to QuickBooks Online account, you will be prompted to login and select the company.
- After successful login, you will be asked to authorize the connection of your QuickBooks Online account with your InLattice account.
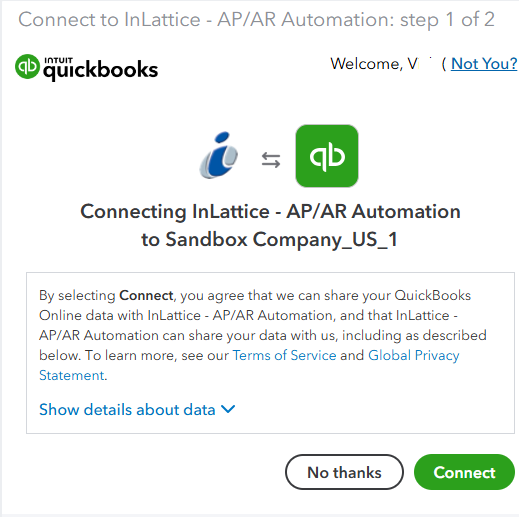
- After authorization, your QuickBooks Online account connection data is saved with Inlattice.
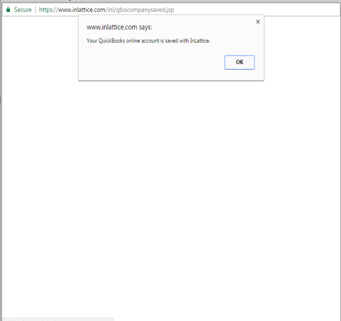
- Click on OK, you will be redirected to your InLattice account
- Upload QuickBooks Vendor List – This can be done using InLattice > Settings > QuickBooks Interface > Refresh Vendor list option.
- Setup Vendor Accounts in InLattice – Go to Settings > Add users to add vendor accounts to InLattice. Based on your set up, you can also enter vendor bank information here.
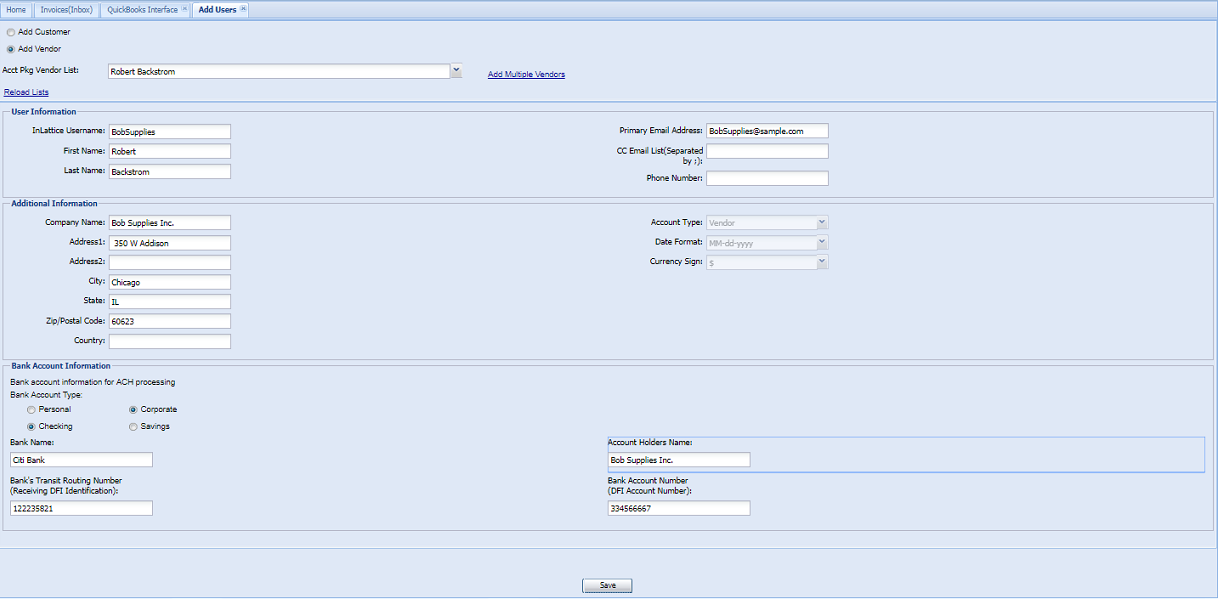 Settings > Add Users > Add Vendors Screen (Bank information is optional)
Whenever new vendors added to QuickBooks,- Upload QuickBooks Vendor List
- Setup New Vendor Accounts in InLattice
- Send Vendor Login information to vendors – You will receive email notification with vendor userid and password. (InLattice Support Team can set up user accounts, after the vendor list is uploaded to InLattice)
If you receive a lot of invoices from Vendors, InLattice can save you quite a bit of time by automating the Bill creation process. As you use InLattice to Post bills from Vendor Invoices, InLattice will learn the mapping that you use from Invoice lines to Bill Lines. Subsequent bills created from same Vendor will be automatically mapped using the previously learned mapping. So, after creating a few bills, new bills can be posted just with a click of a button.
Here’s a quick ‘how to’ Guide
Vendor Creates an Invoice with Rose Plants, Porch Lighting and Patio Lighting as Line Items.
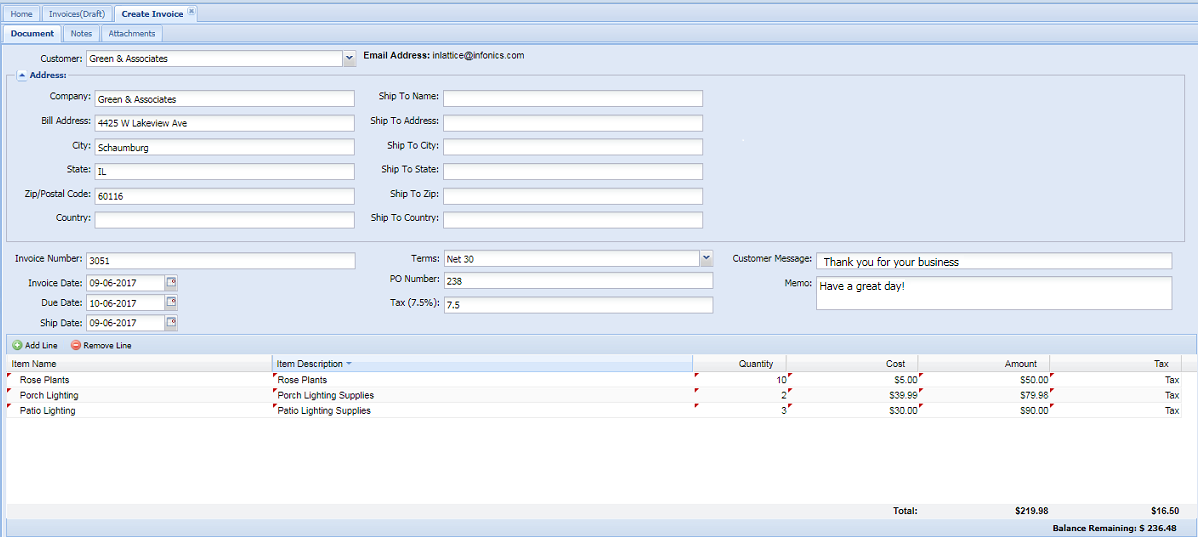
Create Bill – Once this Invoice is received, you will create a Bill, InLattice will automatically map the known items in the Invoice line to Bill Line. Notice that Rose Plants is already mapped however Porch Lighting and Patio Lighting is not mapped since this is the first Invoice from this Vendor using that item.
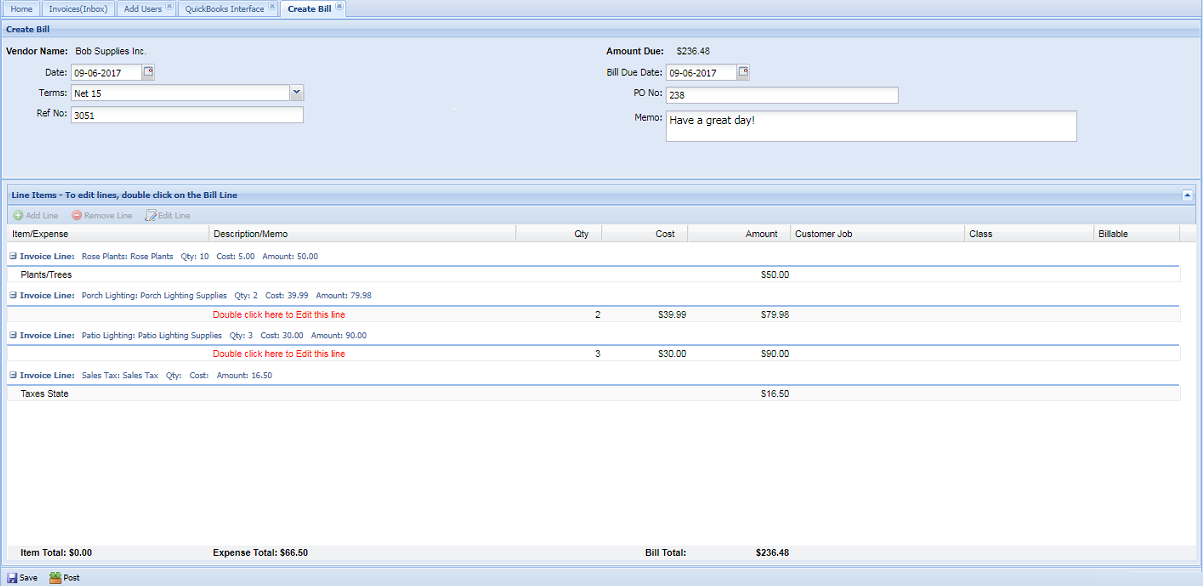 Mapping – You can double clicks on the unmapped Items and manually map them for this Invoice
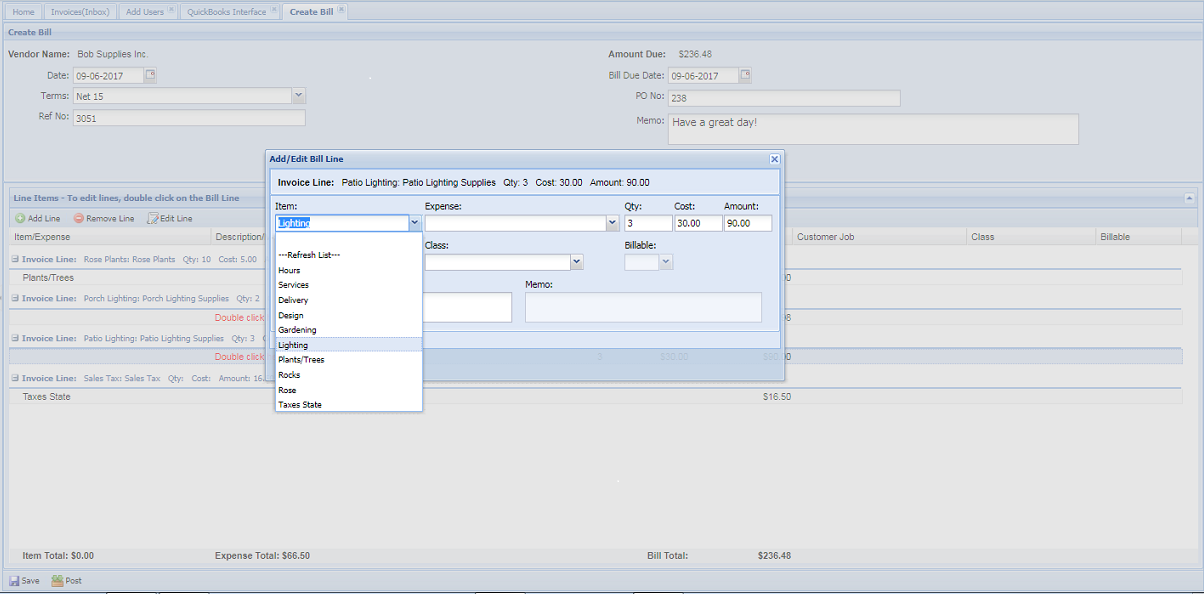
After mapping, invoices are posted as bills.
Automatic Mapping – When vendor sends a new Invoice with same item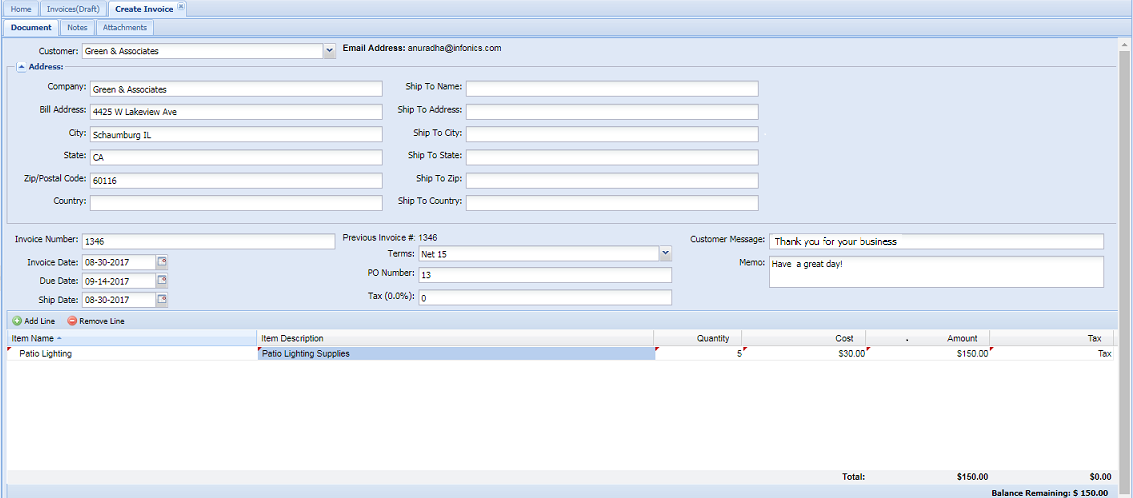 And you try to create the bill, the system automatically maps the Invoice lines to Bill Lines for Patio Lighting (in Invoice) to Lighting (in Bill).
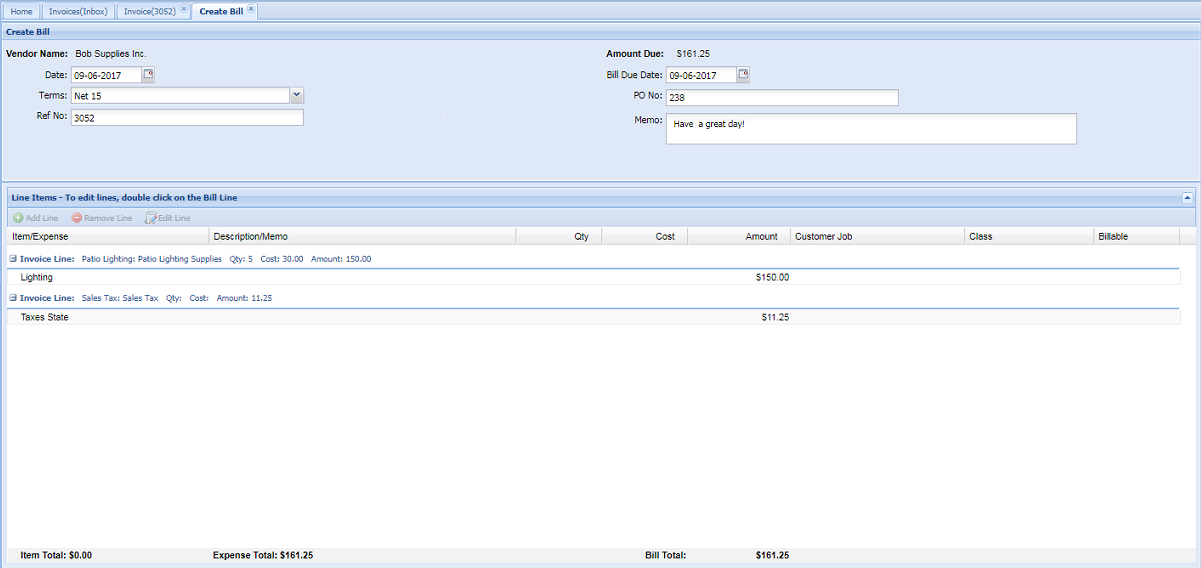
The invoice can be posted as bills, with no data entry.
In summary,
- Vendors creates invoices online.
- Attaches any supporting documents
- Sends the invoices
- You will post invoices as bills to QuickBooks, with automatic mapping of invoice line items to bill line items.
Notes:
- InLattice also provides a “Bulk Posting” feature which uses the automatic mapping logic and allows posting of multiple vendor invoices with a single click that can save a lot of time and effort.
- Also, invoices can be received by the manager and sent account staff, after the approval by the manager.
For additional support, please contact us at support@inlattice.com