InLattice AP/AR Automation
The simplest way to automate your accounting process
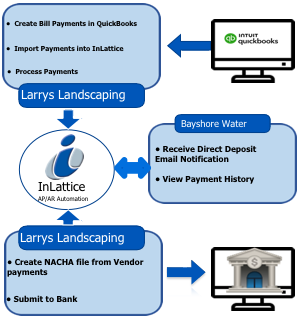
Vendor Payments ACH/NACHA for QuickBooks Desktop
Stop Writing Checks – Make Direct Deposits to Your Vendors
Make Payments to Vendors by Direct Deposits using ACH – NACHA file
InLattice allows you to create NACHA file required for banks to process ACH transactions.
Provide Online Access to payment details Provide payment history to Vendors
The process includes registration, one time setup of vendor accounts with bank information, importing bill payments info from QuickBooks and creating NACHA file.The ACH/NACHA file created by InLattice, needs to be submitted by you, to your bank for further processing. Please contact your bank for more information on requirements for processing NACHA file.
How it Works?
- Register with InLattice.
- Download and install the free QuickBooks Web Connector file- When you login first time, the below screen gives the link to download QuickBooks Web Connector file.

On click of “click here” your browser’s file download dialog box is brought up. When this box appears, choose “Ok”, and put the file somewhere on your computer where you can easily find it, such as on your desktop. This is the InLattice application file.

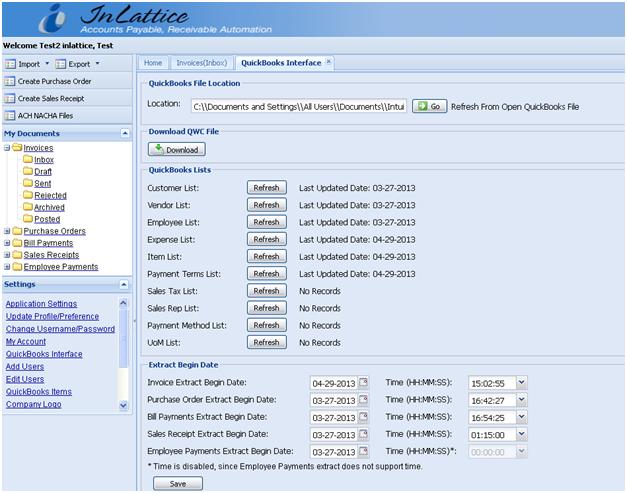
QuickBooks Web Connector file can also be downloaded from QuickBooks Interface screen after logging in.
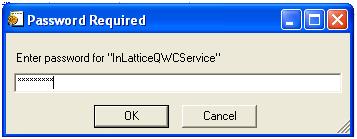
- Setup InLattice with the QuickBooks Web Connector – To begin this step, start QuickBooks on your computer and open your company file. Double click on the saved file InLattice_test2@infonics.com.qwc, the below window appears, click OK.
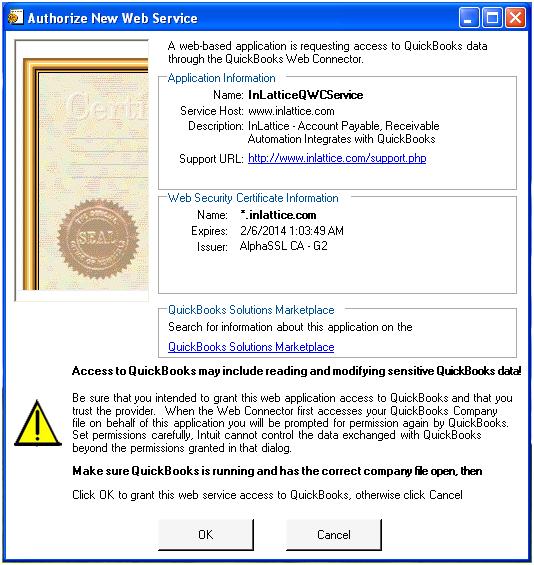
The QuickBooks Web Connector window will appear with the InLattice application listed.
- Run the QuickBooks Web Connector – To make InLattice active, follow these two steps
- Enter your Inlattice password into the password field. This is the password that you use when you log in to the Inlattice.
- Check the check box in the left column and click “Update Selected”.
Note: If you change your password in the Inlattice, you will need to change it in the QuickBooks Web Connector window.
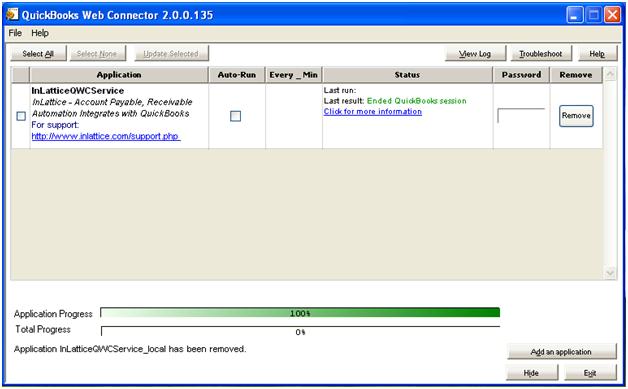
Password can be saved and no need of entering password every time when Web Connector is run.
- Upload QuickBooks Vendor List – This can be done using InLattice > Settings > QuickBooks Interface > Refresh Vendor list option
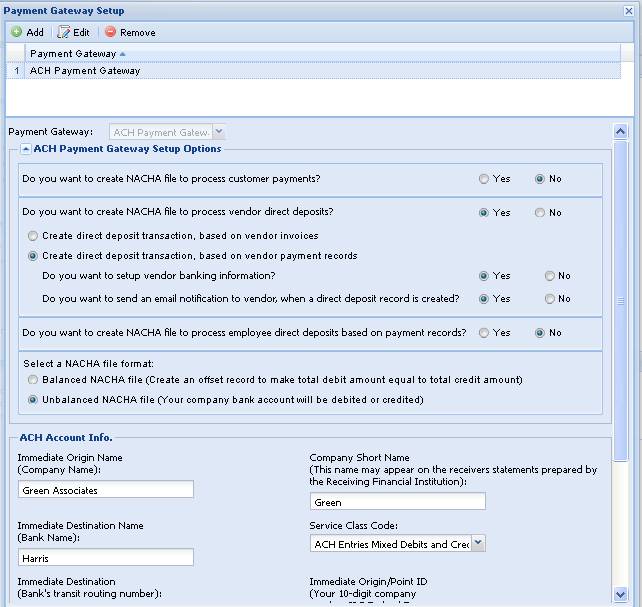
- Set up ACH Payment Gateway Data – You need to have an ACH account with the Bank. This information is entered in Settings > Setup Payment Gateway > Add/Edit ACH Payment gateway option
- You will have the multiple options for creating NACHA file. Select appropriate options.
- If you want to maintain (Add/Edit) Vendor Banking information, Select Yes in “Do you want to setup vendor banking information?” Otherwise for testing purpose, you will be required to login as a vendor to enter this information.
- Select Balanced/Unbalanced file option based on your bank’s requirements
- Enter other data provided by the bank.
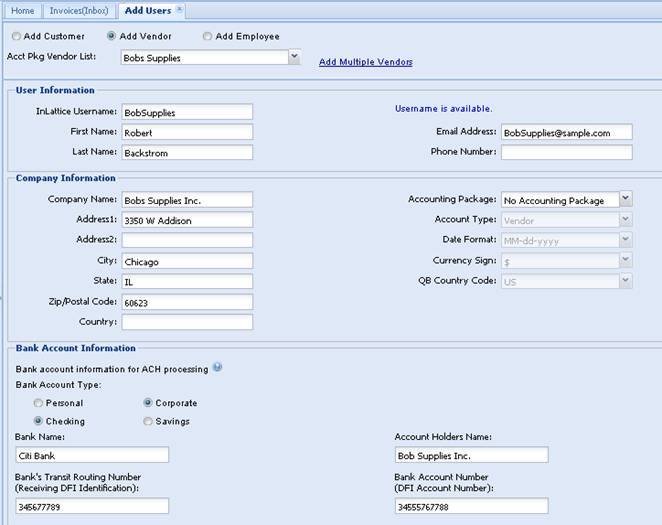
- Setup Vendor Accounts in InLattice – Go to Settings > Add users to add vendor accounts to InLattice. Based on your set up, you can also enter vendor bank information here. You will receive email notification with vendor userid and password. (InLattice Support Team can set up user accounts, after the vendor list is uploaded to InLattice).
- Set Up Vendor Bank account info – Either you can do as part of step 5 or you need to login to vendor account to update this information.
- Enter Bill Payments Extract Begin Date – Go to Settings > QuickBooks Interface > Enter Bill Payments Extract Begin Date and enter a date.
Whenever new vendors added to QuickBooks,
- Upload QuickBooks Vendor List.
- Setup New Vendor Accounts in InLattice.
- Set Up Vendor Bank account info
Use Settings > Application Settings screen to enable/disable various features of InLattice, setup user preference and banners, header images etc.
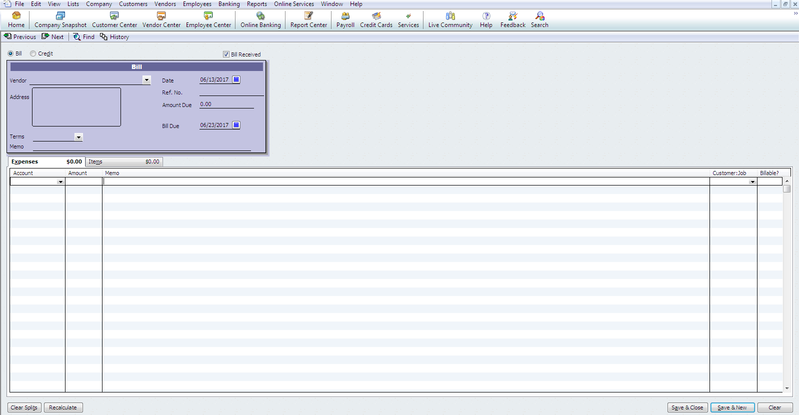
- Create Bill Payments for the vendors in QuickBooks.
- Login to InLattice account
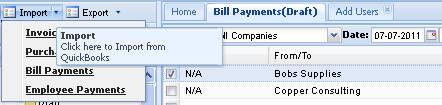
- Click on Import > Bill Payments
- Run Web Connector.
- All payments made in QuickBooks since last import will be uploaded to InLattice > Bill Payments > Draft folder. You will be directed to Bill Payments > Draft folder.
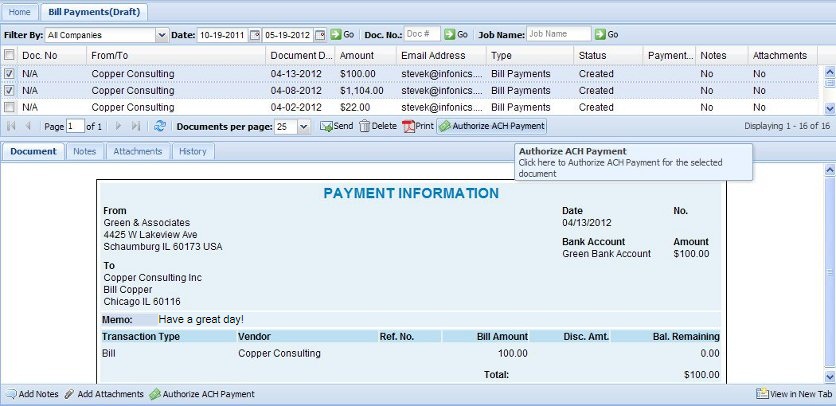
- You can authorize all payments by selecting all payments in draft folder and clicking on Authorize ACH payment.
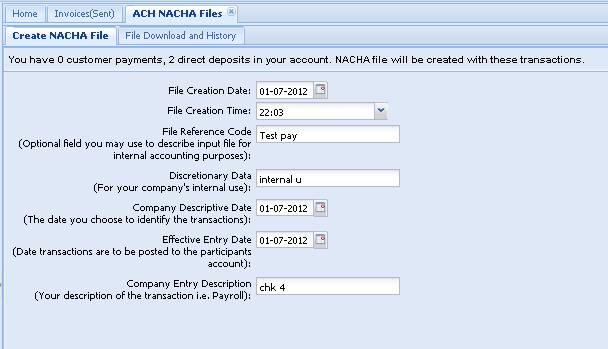
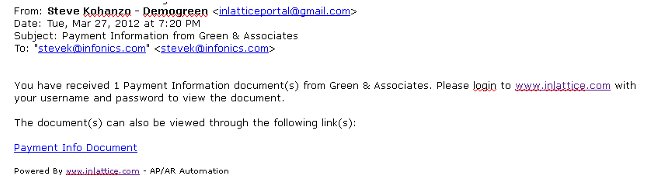
- Click on ACH NACHA file button and click on Create File button. You will be directed to the file download screen. Vendors will receive an email notification, informing them about the payment, if email notification option is enabled.
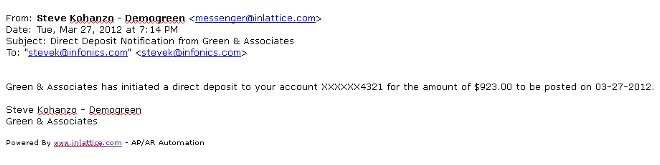
Direct Deposit Email Notification |
- Download the file most recent ACH NACHA file.
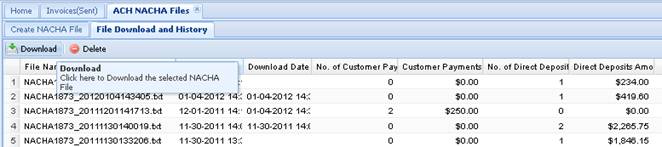
- Send the NACHA file to Bank as per your bank’s guidelines.
- You can also send all payment info to Vendors. Vendors will receive an email with a link to payment document. Vendors can access these documents online for two years.
|
- If you do not want to send the payment details to Vendors, you can delete the rows from the draft folder.
For additional support, please contact us at support@inlattice.com